Industries and Cargo
 Beside the passengers, cargo transportation is the second mainstay for the companies. There are 36 cargo items in Transport Fever 3:
- 12 raw materials
- 11 intermediate products
- 3 booster products
- 10 end products
The raw materials come from industries that do not depend on incoming cargo. Intermediate products are produced by industries which use incoming cargo to produce material for other industries. Booster products are used by the industries of raw materials to increase production. End products are delivered from industries to industrial and commercial districts in towns depending on their requirements. Some cargo types are used in multiple contexts, e.g. they are demanded by towns as well as they are used for the production of more complex products.
Not all cargo types are available in every climate zone. E.g. the paper mill and printing press exclusively appear in the subarctic climate. At the beginning of a map, not all industries and cargo types are present. Once towns grow, they have additional and more complex demands.

Industries
There are 32 different industries in Transport Fever 3. Some of them require the delivery of cargo from other industries to start production, others produce without external needs.
By clicking on a industry in any camera view or any other place where the industry is mentioned, the industry window pops up. This window provides all the important info about the industry, including the production, input and output stocks, supplier and consumer lists as well as some charts. The later three are explained in the statistics section.
 ,
,Production
The top section Production of the industry window shows the production rule of the industry. See the list below to find out which industry has which production rule. Raw industries like farms, mines and the logging camps always produce some cargo without requiring input cargo. Other industries like the saw mill, steel mill and brewery need to have some cargo in the input stock to start production. At the top, the basic rule is shown with small ratio numbers. The amount of consumed and produced cargo within the last 365 days and the theoretical maximum per year are shown below.
For raw industries, the amount of plots (fields, plantages, mine shafts etc) has an impact on the production. When such an industry is served well, it will start to expand by adding more plots in the surrounding area. If this area is blocked or existing plots are bulldozed to construct something else, this limits or reduces the production.
Booster
Each industry can be boosted by providing a passenger connection to reach the industry. If a sufficient amount of workers show up frequently, the overall throughput of the production increases. When too few workers have recently been at the industry, the worker booster stops again. The Booster section can be expanded to see a list of the workers.
Raw industries have a second way of boosting. By providing enough cargo of a specific booster cargo type (Fertilizer, Machines or Tools), the booster can be started. The booster will consume cargo items from the input stock. The boosting effect will stop once there are not enough items for the booster to run.
Input Stocks & Output Stocks
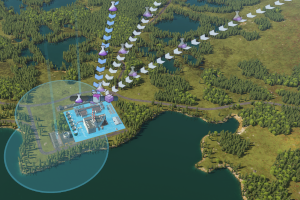 The Input Stocks and Output Stocks sections list the current number of items stored in the industry as well as the upper limit. When expanded, they also show a list of potential sources or destinations for the cargo. This is also visualized in the game world by symbolic links. The relations actively used are animated, the others are static.
All produced cargo items stay at the industry where they are produced until they are picked up by a suitable vehicle on a line that is configured to pick up that cargo type at or near the industry. It is up to the player to decide where the cargo is transported to. If cargo is not picked up and the output stock reaches is limit, the production continues anyway, but the excessive cargo items are destroyed. That is also shown in the chart in the bottom section Cargo Flow. Waiting items in the output stock are also shown as a number in the HUD above the industry.
The cargo layer can be used to plan the connections between industry and get a quick overview over the yearly demand and supply across the map.
Dynamic industry spawning and closure
Over time, additional industries will spawn and unused industries may be abandoned, given that the relevant conditions are met. New industries will spawn when the demand raises high enough or when new cargo types are demanded for the first time.
Unused industries can be abandoned under the following conditions:
- The Industry closure frequency is not set to Never.
- No goods have been consumed/produced in the last 10 years.
- No goods have been shipped from this industry in the last 10 years.
- The industry is not owned by the player.
You will receive a notification if a new industry is spawned or an unused industry is marked for closing respectively. For abandoned industries there is a countdown of 730 days before the industry is effectively closed. This countdown is shown in the notification and additionally above the industry. If the calendar speed is set to paused, real time is shown instead of the number of days. As soon as the countdown is over, the industry will be permanently removed. If the industry starts to consume/produce or ship goods within the countdown, the industry will not be removed and the countdown is stopped.
Cargo Types List
The table below shows all cargo types that are available in free game mode. Some campaign missions use special cargo types not listed here.
| Icon | Cargo | Manufacturer | Consumer | Type | Specialization |
|---|---|---|---|---|---|
 | Beverages | Brewery | Commercial District | End Product | Goods |
 | Books | Printing Press | Commercial District | End Product | Goods |
 | Bricks | Bricks Works | Industrial District | End Product | Goods |
 | Canned Food | Food Factory | Commercial District | End Product | Goods |
 | Cement | Cement Plant | Industrial District | End Product | Bulk |
 | Chemicals | Oil Refinery | Chemical Plant | Intermediate Product | Liquid |
 | Clay | Clay Pit | Bricks Works | Raw Material | Bulk |
 | Clothes | Textile Factory | Commercial District | End Product | Goods |
 | Coal | Coal Mine | Steel Mill | Raw Material | Bulk |
 | Crude Oil | Oil Platform Oil Well | Oil Refinery | Raw Material | Liquid |
 | Dyes | Chemical Plant | Textile Factory Printing Press | Intermediate Product | Liquid |
 | Fabric | Weaving Mill | Textile Factory | Intermediate Product | Goods |
 | Fertilizer | Chemical Plant | Cotton Farm Farm Rubber Farm | Booster Product | Bulk |
 | Fish | Fishing Grounds | Commercial District Food Factory | Raw Material | Goods |
 | Fuel | Oil Refinery | Industrial District | End Product | Liquid |
 | Furniture | Furniture Factory | Industrial District | End Product | Goods |
 | Glass | Glass Works | Furniture Factory Brewery | Intermediate Product | Goods |
 | Grain | Farm | Livestock Farm | Raw Material | Bulk |
 | Iron Ore | Iron Ore Mine | Steel Mill | Raw Material | Bulk |
 | Logs | Logging Camp | Saw Mill | Raw Material | Flatbed |
 | Machines | Machine Factory | Industrial District Vehicle Factory Logging Camp Iron Ore Mine Oil Well Sand Excavator | Booster Product | Flatbed |
 | Meat | Livestock Farm | Commercial District Food Factory | Raw Material | Goods |
 | Paper | Paper Mill | Printing Press | Intermediate Product | Goods |
 | Planks | Saw Mill | Industrial District Furniture Factory Tool Factory | Intermediate Product | Flatbed |
 | Plastic | Chemical Plant | Tool Factory Machine Factory | Intermediate Product | Goods |
 | Rubber | Rubber Farm | Tire Factory | Raw Material | Liquid |
 | Sand | Sand Excavator Sand Pit | Glass Works | Raw Material | Bulk |
 | Sawdust | Saw Mill | Paper Mill | Intermediate Product | Bulk |
 | Sheet Metal | Steel Mill | Food Factory Vehicle Factory | Intermediate Product | Flatbed |
 | Steel | Steel Mill | Machine Factory | Intermediate Product | Flatbed |
 | Stone | Quarry | Cement Plant | Raw Material | Bulk |
 | Tires | Tire Factory | Vehicle Factory | Intermediate Product | Goods |
 | Tools | Tool Factory | Industrial District Clay Pit Coal Mine Fishing Grounds Oil Platform Quarry Sand Pit | Booster Product | Goods |
 | Vegetables | Farm | Commercial District | End Product | Goods |
 | Vehicles | Vehicle Factory | Industrial District | End Product | Flatbed |
 | Wool | Cotton Farm Livestock Farm | Weaving Mill | Raw Material | Goods |
Industries List
The table below shows all industries that are available in free game mode. Some campaign missions use individual industries not listed here.
| Icon | Name | Production | Booster | Temperate | Dry | Tropical | Subarctic |
|---|---|---|---|---|---|---|---|
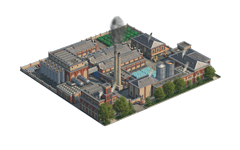 | Brewery | 8 3 ➔ 8 | - | ✔ | ✔ | ✔ | |
 | Brick Works | 4 ➔ 4 | - | ✔ | ✔ | ||
 | Cement Plant | 4 ➔ 2 | - | ✔ | ✔ | ||
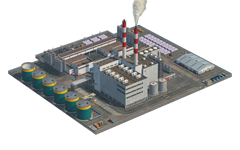 | Chemical Plant | 6 ➔ 2 5 | - | ✔ | ✔ | ✔ | ✔ |
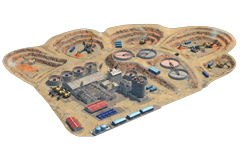 | Clay Pit | 1-16 | | ✔ | ✔ | ||
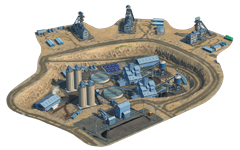 | Coal Mine | 1-16 | | ✔ | ✔ | ✔ | ✔ |
 | Cotton Farm | 1-12 | | ✔ | ✔ | ||
 | Crop Farm | 1-24 1-16 | | ✔ | ✔ | ✔ | ✔ |
 | Fishing Grounds | 1-12 | | ✔ | ✔ | ✔ | |
 | Canning Factory | 2 or 2 and 1 ➔ 2 | - | ✔ | ✔ | ✔ | ✔ |
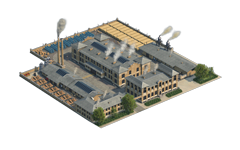 | Furniture Factory | 4 1 ➔ 2 | | ✔ | ✔ | ✔ | ✔ |
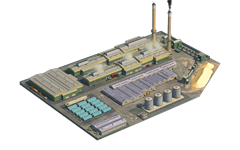 | Glass Works | 4 ➔ 2 | - | ✔ | ✔ | ✔ | ✔ |
 | Iron Ore Mine | 1-16 | - | ✔ | ✔ | ✔ | ✔ |
 | Livestock Farm | 7 ➔ 3 4 | | ✔ | ✔ | ✔ | ✔ |
 | Logging Camp | 1-8 | - | ✔ | ✔ | ✔ | ✔ |
 | Machine Factory | 7 4 ➔ 7 | - | ✔ | ✔ | ✔ | ✔ |
 | Oil Platform | 1-4 | | ✔ | ✔ | ✔ | ✔ |
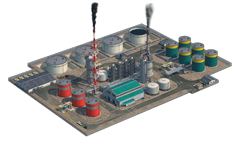 | Oil Refinery | 4 ➔ 2 1 4 | - | ✔ | ✔ | ✔ | ✔ |
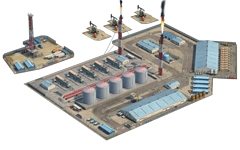 | Oil Well | 1-6 | | ✔ | ✔ | ✔ | ✔ |
 | Paper Mill | 4 ➔ 2 | - | ✔ | |||
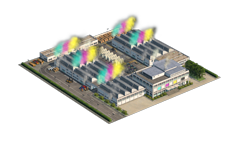 | Printing Press | 4 2 ➔ 4 | - | ✔ | |||
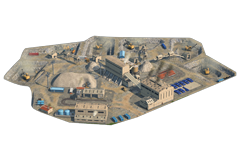 | Quarry | 1-16 | | ✔ | (✔) | ✔ | ✔ |
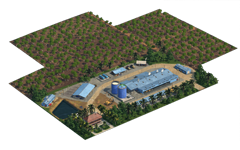 | Rubber Farm | 1-32 | | ✔ | |||
 | Sand Excavator | 1-8 | | ✔ | ✔ | ✔ | |
 | Sand Pit | 1-8 | | ✔ | ✔ | ✔ | ✔ |
 | Saw Mill | 4 ➔ 4 8 | - | ✔ | ✔ | ✔ | ✔ |
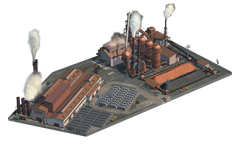 | Steel Mill | 6 6 ➔ 4 3 | - | ✔ | ✔ | ✔ | ✔ |
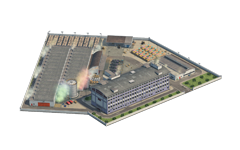 | Textile Factory | 4 2 ➔ 3 | - | ✔ | ✔ | ✔ | ✔ |
 | Tire Factory | 4 ➔ 2 | - | ✔ | |||
 | Tool Factory | 4 2 ➔ 5 | - | ✔ | ✔ | ✔ | ✔ |
 | Vehicle Factory | 1 4 1 ➔ 1 | - | ✔ | ✔ | ✔ | ✔ |
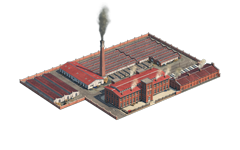 | Weaving Mill | 4 ➔ 4 | - | ✔ | ✔ | ✔ | ✔ |