Stations and Depots
Stations and Depots are both constructions that are required for the operation of vehicles. Stations are used to allow passengers and cargo to board or disembark the various means of transportation. Depots, hangars and shipyards are the only places where you can buy vehicles. While they are independent buildings for road, rail and water traffic, the hangars for aircrafts and helicopters are integrated in airports or heliports.
Stations
In Transport Fever 3 it is possible to construct combined stations for passengers and cargo. Depending on the station type, the individual terminals may be exclusive for passengers or for cargos. See the lines management section for further details on what to be aware of when setting up lines to combined stations.
Building Stations

Place the station by clicking

Add modules at blue markers
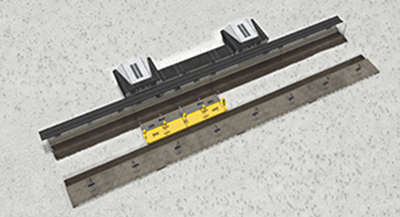
Remove modules by using the  tool
tool

Stations can be found in the Buildings tab of the four transportation tools. Per default, all available buildings can be seen. Press the  category filter icon to only show passenger stations or the
  icon for cargo stations.
 and select
Most of the stations in Transport Fever 3 are constructed in a modular way. After you have selected the station that you want to build from the menu, you can change some initial parameters like number of platforms or tracks and length in the settings menu on the right side. Then you can click at the location where the station should be built. Rotation and height can also be changed:
- Rotation is changed by pressing M and N keys.
- Height is changed by pressing , and . keys.


When you hold SHIFT, the steps are smaller resulting in more precision. Another way to change rotation is by pressing SHIFT while holding the left mouse button and moving the cursor sideways.

Stations will automatically snap to tracks or streets or even coastlines in case of harbor buildings. Press SHIFT to prevent stations from snapping. If there is no warning/error message, you can click on the left mouse button to build the station. The landscape automatically adjusts to the station. If a station construction requires demolishing some buildings, they will be highlighted in yellow and the cost for demolition is automatically added to the cost preview. Additionally, a warning will be displayed.
Configuring Stations
An existing station can be reconfigured and extended by selecting the Configure button in the station window. The map will switch to a white configuration mode for modular stations. These stations consist of different types of modules like tracks, platforms, buildings, roofs, underpasses and a lot more. You can find them in the menu at the bottom of the screen. Navigate through the tabs there to get to the desired module. Each type of module has some individual restrictions regarding positioning, e.g. tracks are always lined up parallel to each other. Some modules, for example roofs or underpasses, can only be placed on top of or below other modules. Additionally, many modules of the stations can be replaced by other modules of the same size. Modules can be removed by using the tool in the configuration mode. Using the tool outside of the configuration mode will remove the whole station. The individual construction costs will be displayed as a hovering number over the modules.

To finish the configuration, press the  button in the menu bar at the bottom or press ESC once or twice (depending on the situation).

Catchment Area

Stations are only used by passengers or cargo, if the source or destination is within its catchment area. In Transport Fever 3 cargo only needs to be within the catchment radius. For passengers, a valid path must exist that stays reasonably close to the covered area without major detours. While placing or when the built station is selected, the catchment radius is shown in the game world and all buildings, industries and warehouses within the catchment area of the station are colored depending on the status:
- blue when cargo can be transferred from/to the station
- green when passengers can transfer from/to the station
- white when both cargo and passenger can transfer from/to the station.
When placing new stations, small cargo icons are displayed above each town district and industry that has a cargo demand or supply to indicate which type of cargo is accepted by this building.
Station Capacity
 While cargo is stored in industries and warehouses, passengers wait directly at their platforms or at least at the station. Each passenger station has a capacity that depends on the available space. It can be extended by either using longer platforms or by building additional side buildings, which provide shared capacities usable by all platforms. Shared capacities are shown next to the
  icon, within the
 Waiting Hall. Each type of side building provides a different amount of shared capacity. Check the in-game descriptions of each building for details.
Stations can be overloaded to a certain extent, but this has a negative impact on town growth as the passengers get unhappy faster.
Loading Speeds
The time an unload and load operation takes at a station depends on multiple factors; the load speed of the used vehicle, the platform and the storage stock. For some of the station types, specialized cargo platforms are available to increase the load speed for a specific set of cargo types. At this terminal, the load speed for other cargo types will drop significantly though.
Stations by Type
Each type of transportation has some specialties. Some have additional variants, some are integrated with depots, some are restricted to specific terrain areas. The details are explained below.
Road


The road stations initially have up to four platforms for buses, trams or trucks. For the cargo station, it is possible to choose either the universal terminals or one of the specializations. The stations can be extended by modules with 10 meters length each. It is possible to attach cargo modules to a passenger station and vice versa to create a combined station. Additional vehicle entries and exits on any side can be added too.
An alternative to the station constructions are small road stops which can be attached to a street side. As long as they are placed in the same street section, stops on the opposite side of the street are grouped to one station. These stops can be used both for passenger and cargo transport, but the load speed for cargo is slower than in the larger stations.
| Icons | Station Type | Initial Terminals | Configurable | Availability |
|---|---|---|---|---|
 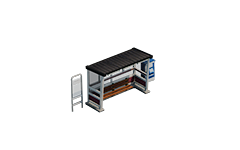  | Road Stop | 1 Stop or 1 Stop per side | 1900 - 1950 1950 - 1980 from 1980 |
|
   | Bus/Tram Station | 1, 2 or 4 Terminals | ✔ | 1900 - 1950 1950 - 1980 from 1980 |
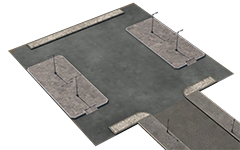 | Cargo Station | 1, 2 or 4 Terminals | ✔ | from 1850 |
Rail


The rail stations initially have up to 8 tracks and are available as through or terminus stations. They can be extended by modules with 40 meters length each and can get a mix of terminus and through tracks. By using different track modules, it is possible to electrify just some of the tracks or upgrade them individually to highspeed tracks. Advanced rail station layouts with intermediate tracks without platforms for passing trains or half platforms with a switch in between can be achieved too.
It is possible to attach cargo platforms and buildings to a passenger station and vice versa to create a combined station.
Station buildings can be attached on all sides, the use of multiple entrance buildings at different sides of the station increases the catchment area.
| Icons | Station Type | Availability |
|---|---|---|
 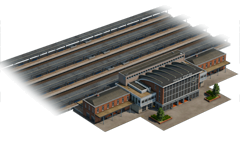  | Passenger Through Station | 1900 - 1950 1950 - 1990 from 1990 |
 | Cargo Through Station | from 1900 |
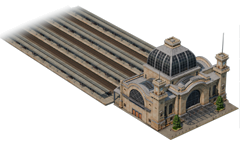 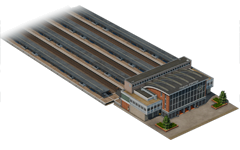  | Passenger Terminus Station | 1900 - 1950 1950 - 1980 from 1980 |
 | Cargo Terminus Station | from 1900 |
Water


A harbor can have several landing areas which serve as actual terminals for the ships. While editing, they are marked with a yellow anchor. Please be aware that the landing areas are available in two sizes and large ships can only stop at large landings. There is no distinction between passenger and cargo terminals.
Harbors are restricted to the shore area. The initial station construction has three parts:
1 is the landing area that has to be in navigable water.
2 is the harbor building with a pier. It can be partly over land and partly over water.
3 is the street access area that has to be on solid land.
| Icon | Station Type | Availability |
|---|---|---|
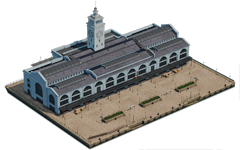 | Passenger and Cargo Harbor | from 1900 |
Air


Airports are special constructions, as they already have aircraft hangars (depots) integrated into them. There are two types of airports available: Airfields for smaller planes and airports for all types of planes and also helicopters. Airports can be extended by a second runway. Then it is possible to add a taxiway, further terminals and hangars on the other side of that second runway. The direction of airport runways can be swapped by placing the approach lights on the side where planes should land.
It is possible to add terminals for both passengers and cargo to the same airfield or airport.
In addition, dedicated heliports are available for helicopters. They feature an integrated helicopter-only depot, which is required to purchase helicopters. Smaller helipads are also available for landing and take-off only.
| Icon | Station Type | Compatible Vehicles | Availability |
|---|---|---|---|
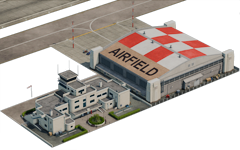 | Airfield | Small Planes | from 1920 |
 | Airport | All Planes and Helicopters | from 1950 |
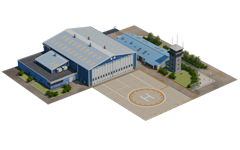 | Heliport | Helicopters | from 1950 |
 | Helipad | Helicopters | from 1950 |
Depots & Maintenance

Depots and shipyards are essential, because they're the only places where you can buy vehicles. They also feature a small maintenance radius within which nearby vehicles are repaired. Additionally, dedicated maintenance buildings are available, which offer an extended maintenance radius to passing vehicles but cannot be used for vehicle purchase. They can be built from the same menus. Note that aircraft do not have dedicated maintenance buildings.
After you have selected the depot or maintenance building that you want to build from the menu, you can click at the location where it should be built. Rotation and height can also be changed:
- Rotation is changed by pressing M and N keys.
- Height is changed by pressing , and . keys.
When you hold SHIFT, the steps are smaller resulting in more precision. Another way to change rotation is by pressing SHIFT while holding the left mouse button and moving the cursor sideways.
Depots and Maintenance Buildings will automatically snap to tracks or streets. If there is no warning/error message, you can click on the left mouse button to build it. The landscape automatically adjusts to the building. If a depot or maintenance building construction requires demolishing some buildings, they will be highlighted in yellow and the cost for demolition is automatically added to the cost preview. Additionally, a warning will be displayed.
Regarding depots, there are several things to be aware of:
- Make sure that your depots are connected to the existing railroad, street or tram network, so that vehicles have a valid path to the first stop of the line to which they are assigned.
- Shipyards must be near navigable waters. If you buy a new ship and assign it to a line, make sure that a path through navigable waters exists from the depot to the first stop of that line.
- Aircraft are bought in hangars, which are part of every airport.
- Helicopters are bought in special hangars, which are part of the heliport only.
Learn more about assigning vehicles to lines on the line manager page.
| Icon | Depot Type | Availability |
|---|---|---|
 | Road Depot | from 1900 |
 | Tram Depot | from 1900 |
 | Train Depot | from 1900 |
 | Shipyard | from 1900 |
 | Road Maintenance Building | from 1900 |
 | Rail Maintenance Building | from 1900 |
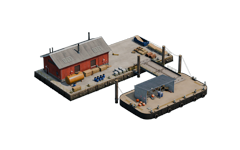 | Water Maintenance Building | from 1900 |